How to convert a string to lowercase in Linux?

In a recent project, the string generated by uuid needs to be converted to lowercase.

So, we used the following Linux command to convert the string to lowercase.

Let’s use the awk, tr and sed commands to convert the string to lowercase.

Here I use the uuidgen command to generate uuid;

Example

In the following example, we use the uuidgen command to generate uuid, and then pipe the generated uuid as the input of the awk command and use the tolower function to convert lowercase.

➜  ~ uuidgen | awk '{print tolower($1)}'

tolower( String ) :

Returns the string specified by the String parameter, and each uppercase character in the string will be changed to lowercase. The mapping between uppercase and lowercase is defined by the LC_CTYPE category of the current locale.

In the following example, we also use the uuidgen command to generate uuid, and then use the tr command to convert the input uuid string into lowercase through the pipeline.

➜  ~  uuidgen  | tr '[:upper:]' '[:lower:]'

[:lower:] :  All lowercase letters

[:upper:] : All uppercase letters

In the following example, we use the sed regular to convert to lowercase strings.

➜  ~ uuidgen |sed -e 's/\(.*\)/\L\1/g'

Posted in Awk Command, Sed Command, Text Processing | Tagged , , , | Comments Off on How to convert a string to lowercase in Linux?

How to use curl to download 302 redirect files in linux

Sometimes, we will encounter the file address that needs to be downloaded 302 redirected to another address.

How do we download it this time?

The answer is curl.

curl  is a tool to transfer data from or to a server, using one of the supported protocols (DICT, FILE, FTP, FTPS, GOPHER, HTTP, HTTPS, IMAP, IMAPS, LDAP, LDAPS, POP3, POP3S, RTMP, RTSP, SCP, SFTP, SMB, SMBS, SMTP, SMTPS, TELNET and TFTP). The command is designed to work without user interaction.

So how to use curl to download 302 redirected files?

We need to use the -L or –location option to enable curl to follow HTTP redirects.

  -L, --location
    (HTTP)  If the server reports that the requested page has moved to a different location (indicated with a Location: header and a 3XX response code), this option will make curl redo the request on the new place. If used together with -i, --include or -I, --head, headers from all requested pages will be shown. When authentication is used, curl only  sends  its  credentials  to  the  initial  host. If a redirect takes curl to a different host, it won't be able to intercept the user+password. See also --location-trusted on how to change this. You can limit the amount of redirects to follow by using the --max-redirs option.
 
    When curl follows a redirect and the request is not a plain GET (for example POST or PUT), it will do the following request with a GET if the HTTP response was 301, 302, or 303. If the response code was any other 3xx code, curl will re-send the following request using the same unmodified method. 

Examples

curl -L -o ubuntu.iso https://mirrors.nju.edu.cn/ubuntu-releases/21.04/ubuntu-21.04-desktop-amd64.iso

Posted in File & Directory | Tagged , , | Comments Off on How to use curl to download 302 redirect files in linux

How to download files using linux command line

When we use linux, we often encounter the situation of downloading files, so how do we use commands to download files in linux?

Today, I want to share with you two commonly used file download commands:

  • wget
  • curl

Syntax

curl [options] [URL...]
wget [option]  [URL]

Curl:

  • -L, –location
            (HTTP)  If the server reports that the requested page has moved to a different location (indicated with a Location: header and a 3XX response code), this option will make curl redo the  request on the new place.
  • -d, –data <data>
            (HTTP) Sends the specified data in a POST request to the HTTP server
  • -o, –output <file>
            Write output to <file> instead of stdout.
  • -O, –remote-name
      Write output to a file named as the remote file
  • -H, –header <header/@file>
    Pass custom header(s) to server
  • -e, –referer <URL>
    Referrer URL

wget:

  • -o logfile
    –output-file=logfile
          Log all messages to logfile.
  • -a logfile
    –append-output=logfile
          Append to logfile.

Examples

Use wget to download files

In the following example, we will use the wget command to download the ubuntu iso file. It is recommended to enclose the URL in double quotation marks (“).

wget "https://mirrors.nju.edu.cn/ubuntu-releases/21.04/ubuntu-21.04-desktop-amd64.iso"

If you want the standard output not to output content, you can use the -o or -a option to write the output to the log file.

wget "https://mirrors.nju.edu.cn/ubuntu-releases/21.04/ubuntu-21.04-desktop-amd64.iso" -o logfile

Use curl to download files

In the following example, we will use the curl command to download the Ubuntu iso file.

curl -o ubuntu.iso https://mirrors.nju.edu.cn/ubuntu-releases/21.04/ubuntu-21.04-desktop-amd64.iso

curl -O  https://mirrors.nju.edu.cn/ubuntu-releases/21.04/ubuntu-21.04-desktop-amd64.iso

Posted in File & Directory | Tagged , , | Comments Off on How to download files using linux command line

How to fast search for specified content in large files in linux

When we use linux, we often encounter the situation of searching for specified content in large files.

In this case, we directly use the grep command will be very, very slow, and will affect other normal running programs.

Here, it is recommended to use tail command or head command.

Of course, the premise is to know the approximate location of the search content in the file, the head or the tail of the file.

Syntax

tail -f -c 1G file.log | grep "test"

head -c 100m file.log | grep "test"

tail:

  • -c number
    The location is number bytes.
  • -f      
    The -f option causes tail to not stop when end of file is reached, but rather to wait for additional data to be appended to the input.

head:

  • -c number
    The location is number bytes.

Examples

If we confirm that the content to be searched is at the end of the file, then we can use the following command to search for the specified content in the large file.

tail -f -c 1G file.log | grep "test"

If we confirm that the content to be searched is at the head of the file, then we can use the following command to search for the specified content in the large file.

head -c 1m  file.log | grep "test"

Of course, in some cases, in order to better understand the situation, we need to output the context information of the specified content. At this time, the following commands can be used.

head -c 1m  file.log | grep -C 20 "test"

grep:

  • -A num, –after-context=num
    Print num lines of trailing context after each match.
  • -B num, –before-context=num
    Print num lines of leading context before each match.
  • -C[num, –context=num]
    Print num lines of leading and trailing context surrounding each match.
  • –colour=[when, –color=[when]]
    Mark up the matching text with the expression stored in GREP_COLOR environment variable.

Posted in File & Directory, Text Processing | Tagged , , , | Comments Off on How to fast search for specified content in large files in linux

How to find all files containing specific text on Linux?

In linux, to find all files containing a specific text, we can use the grep command, which can search for the specified text in the file.

In the following example, we will introduce two methods to find all files containing the specified text.

use grep command

Syntax

grep -rnw '/path/to/somewhere/' -e 'pattern'
  • -r or -R is recursive,
  • -n is line number, and
  • -w stands for match the whole word.
  • -l (lower-case L) can be added to just give the file name of matching files.
  • -e is the pattern used during the search

Example

➜  ~ grep -rnwl ~/Documents/blog -e "linuxcommand"
/Users/ylspirit/Documents/blog/awk/grep/test1.txt
/Users/ylspirit/Documents/blog/grep/test1.txt
➜  ~
➜  ~ grep -rnw ~/Documents/blog -e "linuxcommand"
/Users/ylspirit/Documents/blog/awk/grep/test1.txt:8:linuxcommand
/Users/ylspirit/Documents/blog/grep/test1.txt:8:linuxcommand

use grep command and find command

Syntax

find '/path/to/somewhere/' -type f | xargs grep -hl 'pattern'
  • find -type f is find files only.

Example

➜  ~ find ~/Documents/blog -type f | xargs grep -hl 'linuxcommand'

All right.

Posted in Find Command | Tagged , , | Comments Off on How to find all files containing specific text on Linux?

java tutorial: java uppercase first letter

In the following example, two ways to change the first letter to uppercase will be shared.

Example 1

* Use ASCII table
* The ASCII code of lowercase letters a-z is: 97-122;
    public static String upperCaseFirstLetterV2(String str) {
        if(str == null || str.length() <= 0) {
            return str;
        }
        char[] cs = str.toCharArray();
        if(cs[0] < 97 || cs[0] > 122) {
            return str;
        }
        cs[0] -= 32;
        return String.valueOf(cs);
    }

Example 2

* Use string substring function and toUpperCase function
    public static String upperCaseFirstLetterV1(String str) {
        if(str == null || str.length() <= 0) {
            return str;
        }
        String firstLetter = str.substring(0, 1);
        if(!firstLetter.matches("[a-z]")) {
            return str;
        }
        str = firstLetter.toUpperCase() + str.substring(1);
        return str;
    }

Sample code

public class UpperCase {

    /**
     * Use string substring function and toUpperCase function
     *
     * @param str
     * @return
     */
    public static String upperCaseFirstLetterV1(String str) {
        if(str == null || str.length() <= 0) {
            return str;
        }
        String firstLetter = str.substring(0, 1);
        if(!firstLetter.matches("[a-z]")) {
            return str;
        }
        str = firstLetter.toUpperCase() + str.substring(1);
        return str;
    }

    /**
     * Use ASCII table
     * The ASCII code of lowercase letters a-z is: 97-122;
     *
     * @param str
     * @return
     */
    public static String upperCaseFirstLetterV2(String str) {
        if(str == null || str.length() <= 0) {
            return str;
        }
        char[] cs = str.toCharArray();
        if(cs[0] < 97 || cs[0] > 122) {
            return str;
        }
        cs[0] -= 32;
        return String.valueOf(cs);
    }

    public static void main(String[] args) {
        String str = "hello";
        String s = upperCaseFirstLetterV1(str);
        System.out.println("s = " + s);

        String s1 = upperCaseFirstLetterV2(str);
        System.out.println("s1 = " + s1);
    }
}

Posted in Internet Technology | Tagged | Comments Off on java tutorial: java uppercase first letter

SpringBoot 2.* security turn off login authentication

After introducing security dependency into SpringBoot, you need to log in by default to access resources.

<dependency>
	<groupId>org.springframework.boot</groupId>
	<artifactId>spring-boot-starter-security</artifactId>
</dependency>

After starting the app, you will be prompted to enter the user name and password:

Default user name: user

The password will be output in the IDE console as follows:

If you don’t want to use login authentication, you can disable it in two ways:

  1. Add Java annotations on the startup method: @EnableAutoConfiguration
@EnableAutoConfiguration(exclude = {org.springframework.boot.autoconfigure.security.servlet.SecurityAutoConfiguration.class})

2. Add Java annotations on the startup method: @SpringBootApplication

@SpringBootApplication(exclude = {org.springframework.boot.autoconfigure.security.servlet.SecurityAutoConfiguration.class})

Run the application again:

Of course, you can also remove the spring-boot-starter-security dependency.

Posted in Internet Technology | Tagged , | Comments Off on SpringBoot 2.* security turn off login authentication

Failed to configure a DataSource: ‘url’ attribute is not specified and no embedded datasource could be configured.

Initialize the SpringBoot application and run the following error:

Failed to configure a DataSource: ‘url’ attribute is not specified and no embedded datasource could be configured.

Obviously, the application does not configure some related properties of datasource, such as database address, database driver, user name and password.

Therefore, you need to configure the following information in the application.properties :

#application-name
spring.application.name=demo

#port
server.port=7001

#encode
server.tomcat.uri-encoding=utf-8

#datasource
spring.datasource.driver-class-name=com.mysql.jdbc.Driver
spring.datasource.url=jdbc:mysql://localhost:3306/db
spring.datasource.username=root
spring.datasource.password=password
spring.datasource.max-idle=10
spring.datasource.max-wait=10000
spring.datasource.min-idle=5
spring.datasource.initial-size=5

What I use here is com.mysql.jdbc.Driver drive, so the following packages need to be introduced into POM:

<dependency>
	<groupId>mysql</groupId>
	<artifactId>mysql-connector-java</artifactId>
	<version>5.1.25</version>
</dependency>

Run the application again after configuration.

Enjoy SpringBoot.

Posted in Internet Technology | Tagged , | Comments Off on Failed to configure a DataSource: ‘url’ attribute is not specified and no embedded datasource could be configured.

6 methods of executing historical commands in linux bash

Many times when we use the Linux command line, we need to find the used commands.

At this time, you usually like to use the up and down arrow keys or the history command to find the previously used command.

In this article, I’d like to share with you some quick search history command methods that you don’t know.

6 methods of executing historical commands
  • !!
    repeat the previous command
  • !t
    repeat the previous command headed by t
  • !Number
    repeat the previous command with number in the history table
  • !-Number
    repeat the history table countdown number command
  • !$
    gets the last option in the previous command
  • Ctrl + R
    use Ctrl + R to enter the history search mode to query a past command in the history table. After finding the command to be repeated, press enter to execute the command

Examples

skill -1

Like the above command, you can see that I typed !! . Actually, I repeated the last command ls.

skill -2

As the above command, you can see that three rm commands have been typed, and input !r, which matches the last rm -rf t3.log command.

skill -3

With the above command, history sees the number of history. Typed !6532 to execute ll with the number 6532.

skill -4

skill -5

skill –6

Posted in Text Processing | Tagged , | Comments Off on 6 methods of executing historical commands in linux bash

Awk classic case – awk analysis of nginx access logs

Analyze access logs (Nginx as an example)

Nginx combined log format:

'$remote_addr - $remote_user  [$time_local]  '
' "$request"  $status  $body_bytes_sent  '
' "$http_referer"  "$http_user_agent" ';

1. Count the number of visits to the IP:
➜  ~ awk '{a[$1]++}END{for(i in a){print i, a[i]}}' www.linuxcommands.site_nginx.log

2. Count IPs with more than 5 visits:

In the following example, the awk if else conditional judgment statement is used to print out the IP address and the number of access times greater than 5 times.

➜  ~ awk '{a[$1]++}END{for(i in a){if(a[i] > 5) {print i, a[i]}}}' www.linuxcommands.site_nginx.log

3. Count the number of IP visits and sort the top 10:

In the following example, the awk command is used in conjunction with the sort command and the head command to obtain the IP with the top 10 access times.

➜  ~ awk '{a[$1]++}END{for(i in a){print i, a[i]}}' www.linuxcommands.site_nginx.log | sort -k2 -nr | head -10

4. Count access status is 404 ip and times:
➜  ~ awk '{if($9 == "404"){a[$1" "$9]++}}END{for(i in a){print i,a[i]}}' www.linuxcommands.site_nginx.log

5. Count the number of visits in the last minute
➜  ~ # mac 
➜  ~ date=$(date -v -1M +%d/%b/%Y:%H:%M:%S)     
➜  ~ awk -vdate=$date -F'[[ ]' '{if($5==date) c++}END{print c}' www.linuxcommands.site_nginx.log

6. Count the 10 most visited pages:
➜  ~ awk '{a[$7]++}END{for(v in a) print v,a[v]}' www.linuxcommands.site_nginx.log | sort -k2 -nr | head -10

Posted in Awk Command, Text Processing | Tagged , | Comments Off on Awk classic case – awk analysis of nginx access logs

Nginx combined log format and parameter explanation

Because lnmp does not customize the log format by default, it uses the combined default format:

'$remote_addr - $remote_user  [$time_local]  '
' "$request"  $status  $body_bytes_sent  '
' "$http_referer"  "$http_user_agent" ';

Parameter explanation:

  • $remote_addr, $http_x_forwarded_for
    record the client IP address.
  • $remote_user
    records the client user name.
  • $request
    records the requested URL and HTTP protocol.
  • $status
    records the status of the request.
  • $body_bytes_sent
    the number of bytes sent to the client, not including the size of the response header.
  • $http_referer
    records which page link is visited from.
  • $http_user_agent
    records information about the client browser.
  • $bytes_sent
    the total number of bytes sent to the client.
  • $connection
    the serial number of the connection.
  • $connection_requests
    the number of requests currently obtained through a connection.
  • $msec
    log write time. The unit is seconds and the precision is milliseconds.
  • $pipe
    if the request is sent via HTTP pipelined, the pipe value is “p”, otherwise it is “.”.
  • $request_length
    the length of the request (including request line, request header and request body).
  • $request_time
    request processing time, the unit is seconds, the precision is milliseconds.
  • $time_iso8601
    the local time in the ISO8601 standard format.
  • $time_local
    the local time in the common log format.

Posted in Internet Technology | Tagged , | Comments Off on Nginx combined log format and parameter explanation

vim tutorial: vim cursor move

Vim cursor movement can help us quickly locate the position.

This article will show you how to use vim shortcut keys to move the cursor.

Vim cursor movement shortcut keys:

  • up, down, left, and right
    • keyboard direction keys
    • k, j, h, l
  • to the top of the file: gg
  • to the bottom of the file: G (shift g)
  • to the top of the screen: H (shift h)
  • to the bottom of the screen: L (shift l)
  • to the end of the line: $
  • to the beginning of the line: ^
  • to the end of the next word: e
  • to the beginning of the next word: w
  • to the next same word: #

Examples

In the following example, use vim shortcut keys to move the cursor to the end of the screen and move the cursor to the end of the file.

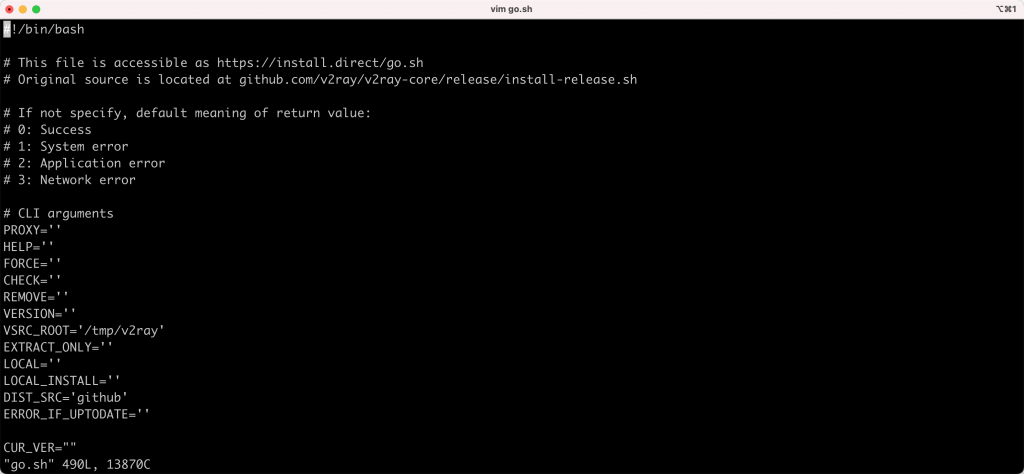
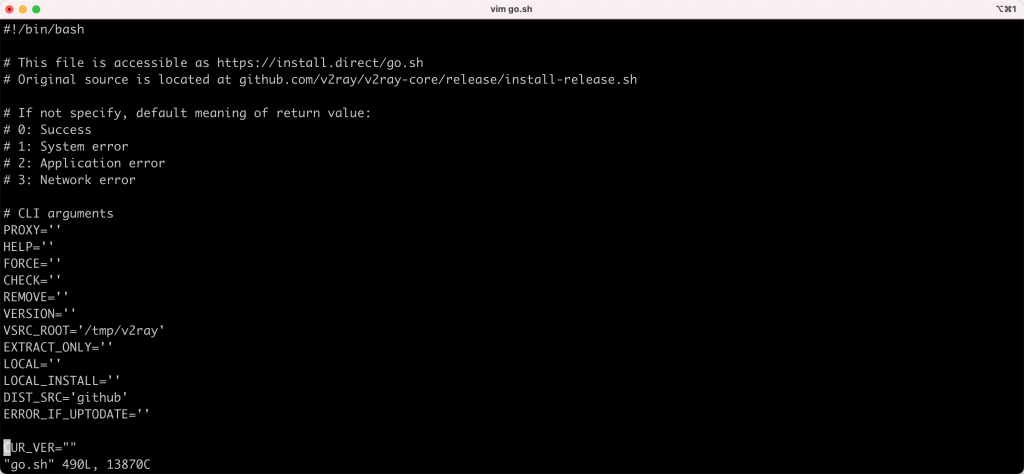
  1. Open the terminal and use vim to open the file: go.sh

2. In normal mode, press shift + l to move the cursor to the end of the screen.

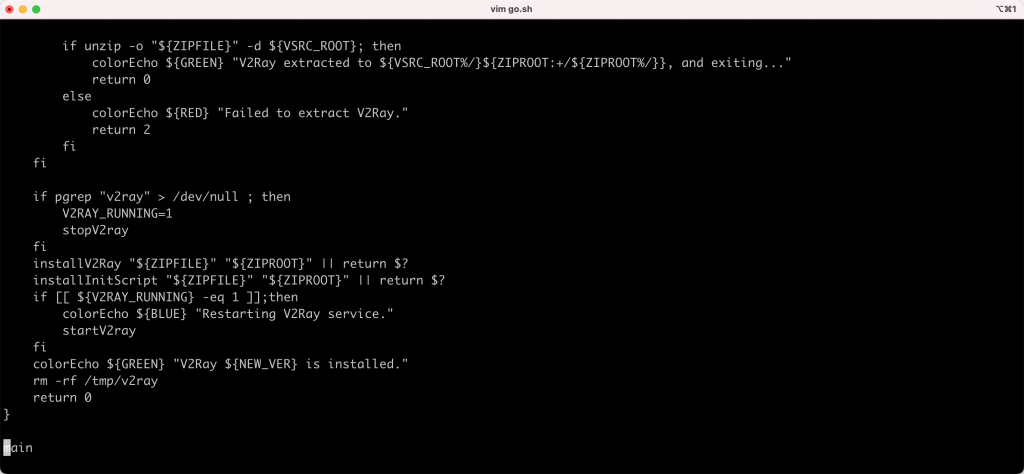
3. In normal mode, press shift + g to move the cursor to the end of the file.

Posted in Text Processing, Vim Command | Tagged , , , | Comments Off on vim tutorial: vim cursor move

java tutorial: java enum in switch case

During the development of the java project, we occasionally use enum in the switch case statement.

This article introduces you how to use enum correctly in java switch case statement.

First of all, it needs to be clear:

An enum switch case label must be the unqualified name of an enumeration constant.

Implementation:

  1. Returns the enum constant of the specified enum type with the specified name.
  2. The case label is an enum constant. Note that the enum class name is not required. If the label uses a class name, such as JobStatus.FAILED, a compilation error will be reported.

So, the correct way to write:

        JobStatus jobStatus = JobStatus.valueOf(status);
        switch (jobStatus) {
            case FAILED:
                ...
                break;
            case CREATED:
                ...
                break;
            case FINISHED:
                ...
                break;
            case EXECUTING:
                ...
                break;
        }

Test code:

JobStatus.class

package com.example.Enum;

import org.apache.commons.lang3.StringUtils;

public enum JobStatus {
    CREATED(1, "CREATED"),
    EXECUTING(2, "EXECUTING"),
    FINISHED(3, "FINISHED"),
    FAILED(0, "FAILED");

    Integer code;
    String name;

    JobStatus( Integer code, String name) {
        this.name = name;
        this.code = code;
    }

    public static Boolean isExist(String name) {
        if(StringUtils.isBlank(name)) {
            return false;
        }

        for(JobStatus item : JobStatus.values()) {
            if(name.equals(item.name)) {
                return true;
            }
        }
        return false;
    }
}

TestEnumInSwitch.class
package com.example.Enum;

public class TestEnumInSwitch {
    public static void main(String[] args) {
        String status = "created";

        enumInSwitch(status);
    }

    private static void enumInSwitch(String status) {

        JobStatus jobStatus = JobStatus.valueOf(status.toUpperCase());
        switch (jobStatus) {
            case FAILED:
                System.out.println("jobStatus = FAILED");
                break;
            case CREATED:
                System.out.println("jobStatus = CREATED");
                break;
            case FINISHED:
                System.out.println("jobStatus = FINISHED");
                break;
            case EXECUTING:
                System.out.println("jobStatus = EXECUTING");
                break;
        }
    }
}

Posted in Internet Technology | Tagged , , , | Comments Off on java tutorial: java enum in switch case

java tutorial: java get timestamp milliseconds

Java get timestamp:

// method 1
System.currentTimeMillis(); 

// method 2
Calendar.getInstance().getTimeInMillis(); 

// method 3
new Date().getTime();

Test code:

import java.util.Calendar;
import java.util.Date;

public class TestGetTimestamp {
    public static void main(String[] args) {
        long currentTimeMillis = System.currentTimeMillis();
        System.out.println("currentTimeMillis = " + currentTimeMillis);

        long timeInMillis = Calendar.getInstance().getTimeInMillis();
        System.out.println("currentTimeMillis = " + timeInMillis);

        long time = new Date().getTime();
        System.out.println("currentTimeMillis = " + time);
    }
}

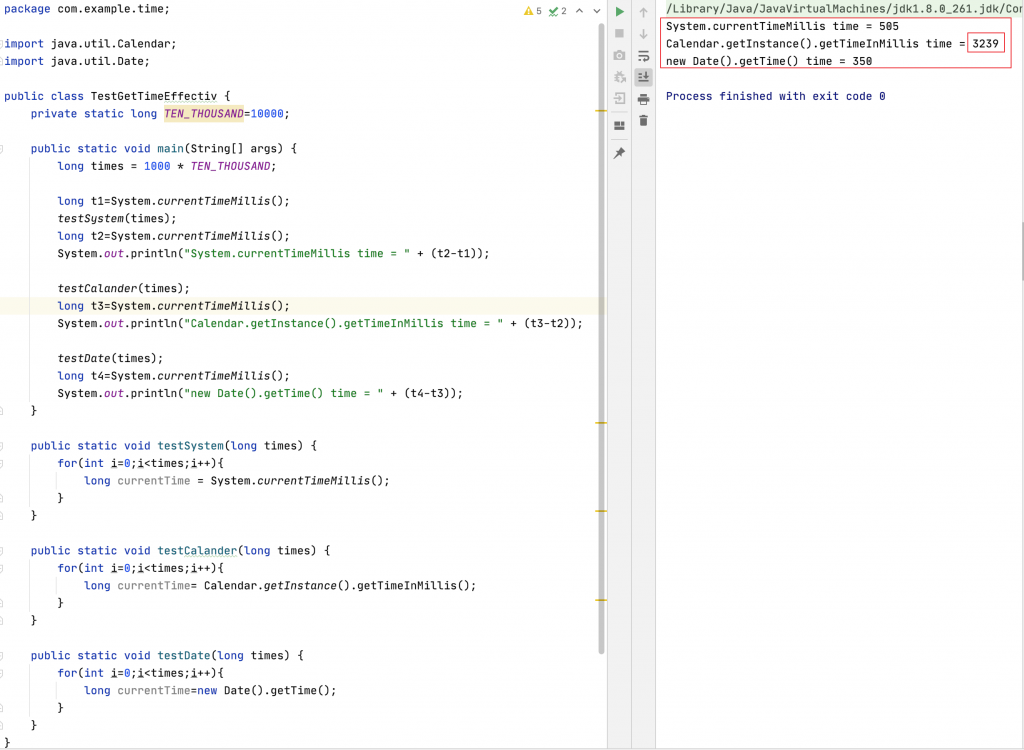
Three ways to perform efficiency testing.

import java.util.Calendar;
import java.util.Date;

public class TestGetTimeEffectiv {
    private static long TEN_THOUSAND=10000;

    public static void main(String[] args) {
        long times = 1000 * TEN_THOUSAND;
        
        long t1=System.currentTimeMillis();
        testSystem(times);
        long t2=System.currentTimeMillis();
        System.out.println("System.currentTimeMillis time = " + (t2-t1));

        testCalander(times);
        long t3=System.currentTimeMillis();
        System.out.println("Calendar.getInstance().getTimeInMillis time = " + (t3-t2));

        testDate(times);
        long t4=System.currentTimeMillis();
        System.out.println("new Date().getTime() time = " + (t4-t3));
    }

    public static void testSystem(long times) {
        for(int i=0;i<times;i++){
            long currentTime = System.currentTimeMillis();
        }
    }

    public static void testCalander(long times) {
        for(int i=0;i<times;i++){
            long currentTime= Calendar.getInstance().getTimeInMillis();
        }
    }

    public static void testDate(long times) {
        for(int i=0;i<times;i++){
            long currentTime=new Date().getTime();
        }
    }
}

Calendar.getInstance().getTimeInMillis() is the slowest, because Canlendar takes more time to deal with time zone issues.

Posted in Internet Technology | Tagged , , | Comments Off on java tutorial: java get timestamp milliseconds

Use FileWriter class to write files in Java

The FileWriter class extends from the OutputStreamWriter class.

This class writes data to the stream character by character. You can create the required objects through the following construction methods.

  • Constructs a FileWriter object given a file name.
FileWriter(String fileName)
  • Constructs a FileWriter object given a file name with a boolean indicating whether or not to append the data written.
FileWriter(String fileName, boolean append)

    · fileName: The file name of the data to be written.
    · append: If the append parameter is true, it means additional writing. If the append parameter is false, it means overwriting.

After successfully creating the FileWriter object, you can refer to the methods in the following list to manipulate the file.

  • Writes a string
public void write(String str)
  • Writes a portion of a string
public void write(String str, int off, int len)
  • Writes a single character
public void write(int c)
  • Writes an array of characters
public void write(char cbuf[])

Example

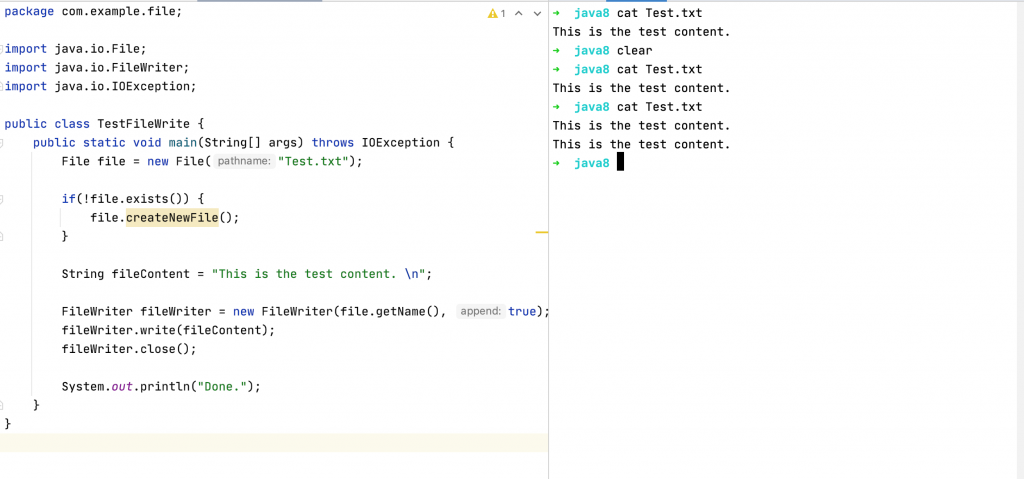
In the following example, the Java FileWriter class is used to write content to the Test.log file by appending.

import java.io.File;
import java.io.FileWriter;
import java.io.IOException;

public class TestFileWrite {
    public static void main(String[] args) throws IOException {
        File file = new File("Test.txt");

        if(!file.exists()) {
            file.createNewFile();
        }

        String fileContent = "This is the test content. \n";

        FileWriter fileWriter = new FileWriter(file.getName(), true);
        fileWriter.write(fileContent);
        fileWriter.close();

        System.out.println("Done.");
    }
}

Posted in Internet Technology | Tagged , , | Comments Off on Use FileWriter class to write files in Java